Cards

About Us

Tuesday, August 31, 2010

Sign up sheets

I made these sign up sheets to recruit some help for our women's meeting at church. This first one is for set up, take down, etc. All of the signs are from Graphically Speaking cart.  I just love all the attitude that cart has!


This next one is a sign up for food.


The last one is for help in our children's class.



Emma's apron

It must be little girl birthday time because it seems my daughter has had quite a few birthday parties to go to! I was itching to make each one an apron, so I found a picture of one online and ran with it. Here's Emma's!
For the "E" I used Storybook cart to cut out with, then I ironed it on with stitch witchery and finally hand stitched around the edges with black cro-sheen yarn to give it definition.


The style these days is so casual, and I new we'd blink and these girls will have outgrown these aprons, so I pulled out my hem foot on my serger and just did a serged edge. I used my gathering foot to make the pleats.  It was the first time I have had success with it and I just love how they turned out!


Birthday Thank You

Here's to all the dear family and friends who gave my son birthday gifts this year. His birthday is on the 4th of July, so you get a little of that theme in the card. "Satisfaction Guaranteed" just seemed to be the perfect phrase for my very active 6 year old!

Graphically Speaking cart and Cuttlebug embossing folder. The "thanks" on the inside is also a Cuttlebug die cut.

inspiration

i saw this t-shirt on a teen-age friend of ours the other day. i'll be honest, i coveted. i love the simpleness of it. all lowercase letters. basic font. bold red and white contrast. i LOVE the message! inspiration hit and i knew i need to decorate with this. my kids need to see this on our wall, or towels, or something....i'm not sure where yet, but somewhere.

Guy's birthday card

I decided one day to challenge myself and make a guy's birthday card for all the men in my life.  My husband is one of eight boys in his family and I have 2 of my own brothers, so with dad's included, I made entirely TOO many of these!

The cart is Graphically Speaking.  Here's the inside.

Monday, August 23, 2010

quilting techniques

I learned this technique from the amazing quilter and owner of Jilly Studio at the quilt show in salt lake a great applique trick so I thought I'd share it here...

1. take your pattern and draw it on a piece of FREEZER PAPER (you can buy this at the grocery store next to the aluminum foil) , then iron it between two pieces of freezer paper (3 pieces total), this makes a pattern that can be used over and over again.
2. Iron the shiny side down to the wrong side of your fabric
3. Cut out 1/4" or so around the freezer papered pattern. (if your edges rounded you'll need to clip them a little around the edges so that they flatten down a bit)
4. Spray starch into a bowl and paint the 1/4" fabric that's showing around your pattern.
5. Iron the edges that are wet from the starch into the pattern.

6. pull the freezer paper pattern out, and you have a turned in edge piece ready to applique!

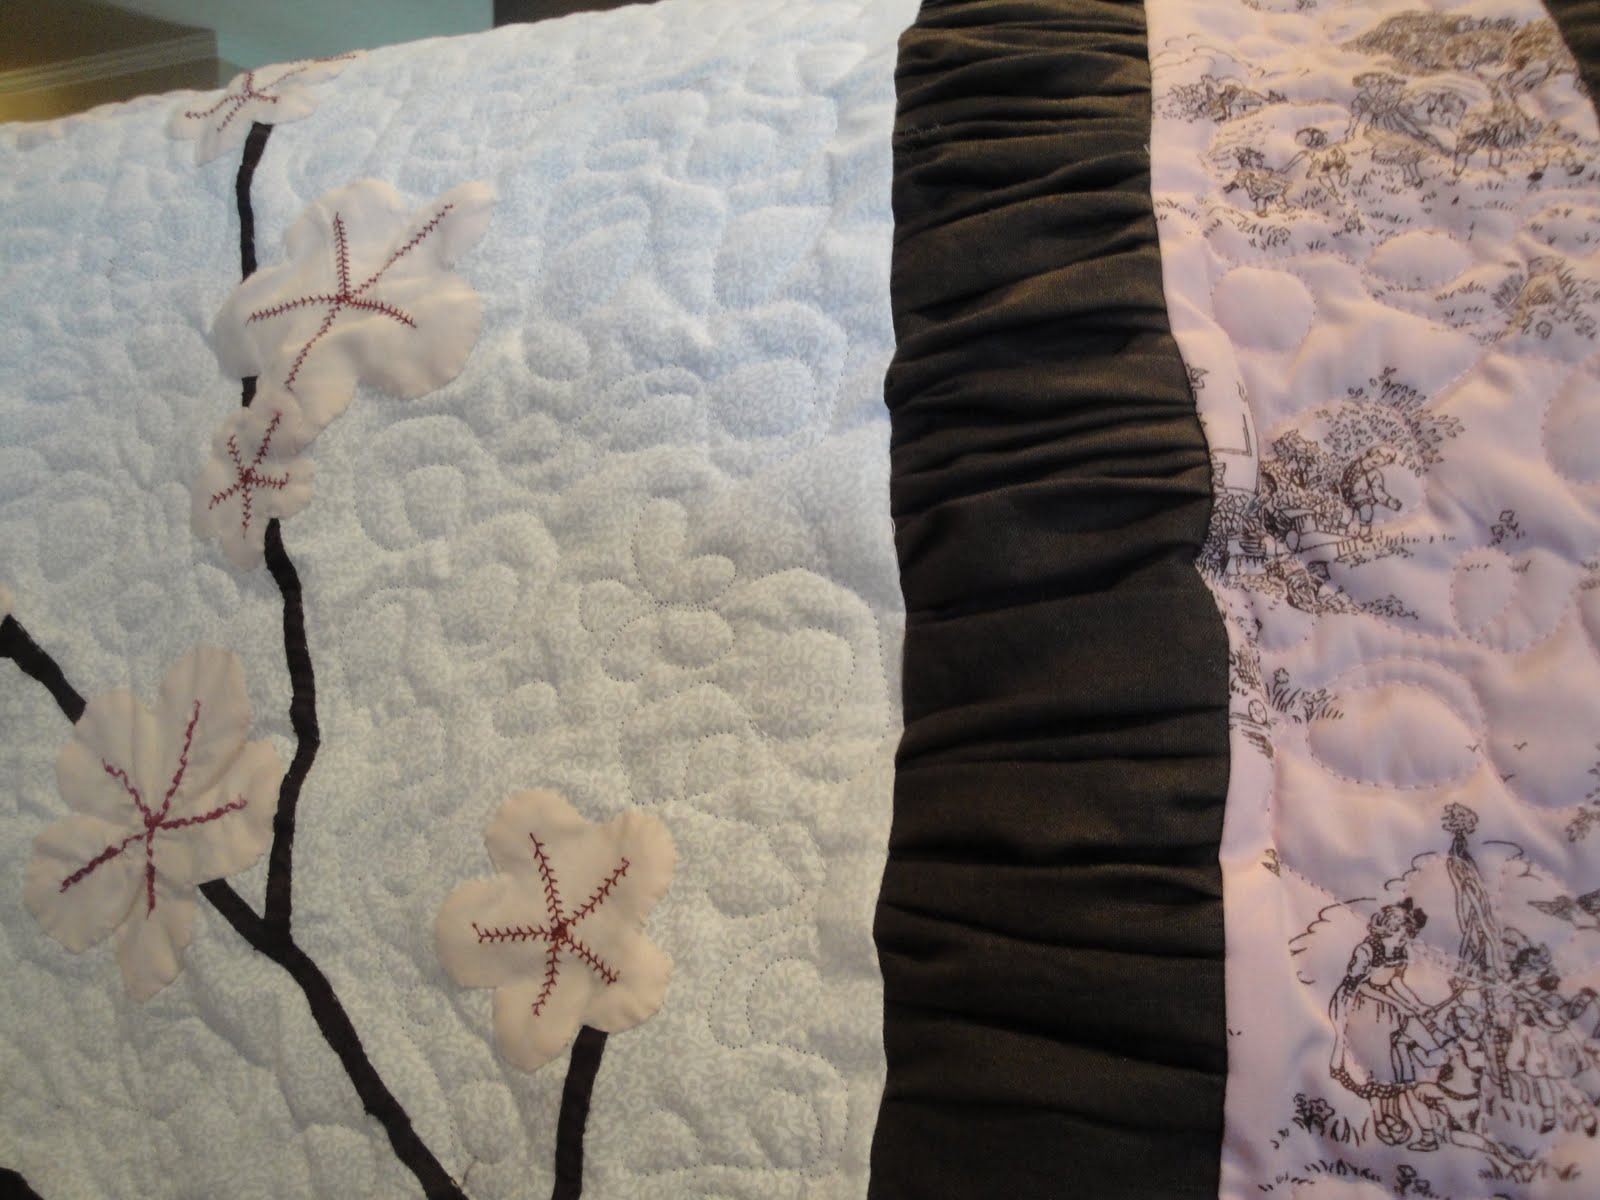
Cherry Blossom Quilt


Its finally finished! I've been working on this quilt for some time now and now that I've given it to Jenny Sue who is having a baby girl this week! (Jeffreys sister whom I love!) I learned a new applique technique that works really well and is easier than other ways to applique. all the flowers are hand sewn and the binding is hand sewn. I came up with the pattern and the ideas myself and couldn't be more proud of how it turned out! I used my awesome new machine (baby lock quilters choice!) to quilt it with small flowers mixed in with the loops. My favorite part is the ruffle boarder!
Wednesday, July 7, 2010

Sympathy Card

Recently my cousin, Ellen passed away. I made this card for her brother's family. It is inspired by Donna Mundinger. She made a beautiful black and white version.
Posted by Picasa

Anniversary Box

My husband and I celebrated our 36th wedding anniverary on June 28th. He is so wonderful to me, always bringing me flowers throughout the year and surprise presents, I have to laugh because he rarely gives me gifts on the day of an event. But that is ok with me because I would rather him do it randomly and surprise me than feel he has to give me a gift because it is traditional. So I thought instead of a tie or shirt or something basicly meaningless, I cut a box from Tag, Bags and Boxes from clear thick plastic. It cut really easy. I embossed the top with the heart folder. I wrapped it in yellow because that is his favorite color! I made a tag from Tie the Knot cart. I made the circle "Reasons I love You" with my computer. I easily came up with 36 reasons I love my husband and curled them around a pencil so they would fluff up a bit in the box. He had a great time reading all the reasons. Then he said, "Only 36?" and I said, "Well, next year I might be able to come up with 37!" We had a great time and he said one of the best gifts I have given.

Tag
Posted by Picasa

Fun New Cards to See

Here are a few cards I have been making for all different occasions.
This frog is from Paisley.

This cute dino was cut from Create a Critter

Inside

Just had to try the new Robotz cart. Nothing like a loving family!


A cute little Russion Doll card from the Paisley cart.

Monday, June 21, 2010

Saturday, June 19, 2010

Thanks A Bunch

My daughters and daughter-in-laws and friends know they are welcome to come to my craft room anytime. That is why I have it. It was fun to have my daughter-in-law (and grandsons) come. Here is a card she made for a friend.
She used SEI paper, WIMG for the words. The flowers were cut from the the new Serenade Cart.
Posted by Picasa

Thank you Flower Card

Here is a thank you card for a special person in my life.
I used a MS punch as the strip under the flower and a Stampin Up boarder punch at the bottom. The flower is made with several different flower cuts, any can be used. There is a link to a tutorial in an earlier post if you are interested in seeing how they are made. The background stamp is from Stampin Up. I used gold ink.

Don't you love this cut? It is from the Calligraphy Collection. I cut it in gold paper. Posted by Picasa

Jeep

Recently my husband and I went to a place by Escalante, UT called Hole in the Wall. We had some friends drive our jeep down as the 55 mile road was all dirt and rocky. We had a great trip. When we came home they had returned our jeep back to us with a full tank of gas and spotless clean. So I made this "Thanks" card from the jeep saying how much it was needed and how appreciative the owners were too!


The jeep is the bus cut from Doodlecharms and the Thanks is from Walk in My Garden. I used ther Gypsy to weld a shaped card. It is hard to tell but the inside of the wheels, headlights and the back extra wheel is shinny silver paper.


Posted by Picasa

Friday, June 18, 2010

Damask Round Pillow

I haven't posted any of my "crafty" projects for a while, mostly because I have about 15 of them going on- most of them quilts and they usually take a while (you'll see them eventually I promise!) However, I went to the fabric store the other day and there in the clearance isle was this beautiful piece of red damask fabric calling my name saying " buy me I'm only $2.00!! So last night, a little red trim, a round pillow and the drive to actually finish something and this is what I came up with! (p.s. isn't Jeffrey cute!?!)

Wednesday, June 16, 2010

Dahlia Card

Here is another take on the Dahlia fold.  The stem comes from Stretch Your Imagination cart.  I just used the blackout feature, then embossed it with the Cuttlebug.  This is also a tri-fold card, so I used the band around the bottom to hold the sides in. 


I made a few of these, but let me tell you, a lot of love went into them.  I'm definitely being selective about who they go to!

Bathroom mirrors

Okay, this post is not a card post!  But I've been creative lately in a different sort of way.  I've been drooling over this framed mirror tutorial and wanted to give it a try.  So here is the end result!

Sorry about the random roll of toilet paper in the pic.  You see that cute 2 year old in the corner of the mirror?  He's got a love for unrolling fresh new rolls of toilet paper into the toilet. Do you have any idea how much toilet paper costs these days?  Good thing he's cute.

I made this with MDF board.  I don't have a table saw (yet), so I had the guy at Home Depot cut me three strips at 3.5 inches and one at 5 inches wide.  I used my hubby's brand new miter saw that he got for Christmas to cut the lengths right. I also bought some small crown molding. I painted everything then sanded down the edges to give a distressed look.  Then hung it all directly on the mirror with liquid nails.  That's right, not a single nail was used!  The secret is to buy the liquid nails that sets in 15 minutes. Worked gloriously! I plan to paint this bathroom a nice, soft tan color, so I pre-painted the edges before I glued the frame boards on. The cost was $15.


Next I did the master bathroom. I think the fresh new blade made all the difference when I cut these boards. Again, I pre-painted the boards, then distressed them. The cost was about $40 for this one. In the tutorial, she used two different kinds of boards, but I didn't want such a big frame around mine and money was an issue since I was also in the middle of replacing my transmission and overhauling my computer. Ugg. so I picked an A-symmetrical baseboard piece that was a little on the large side. I love how it turned out!


The shower curtain is on its way out and someday I'll be done with baby mode and can take my changing table pad out of my bathroom, but for now, this is currently my favorite room in the house!

Tuesday, June 15, 2010

Teacher gifts

My son's teacher retired this year and we wanted to give her something special.  Here is what we came up with.  The cart was A Child's Year of course! The frame was a cheapy $5 frame from Wal-Mart and the ribbon I bought at a garage sale for $2.


Here is the gift we gave the Student Aid teacher too.  The kids did a lot during the year with nature and animals.  Every week they had a different animal hosted in their classroom and at the beginning of the year the teacher took them outside into the fields, found a monarch caterpillar, brought it inside and watched it transform into a beautiful butterfly!  The little boy silhouette was just perfect for this memory.