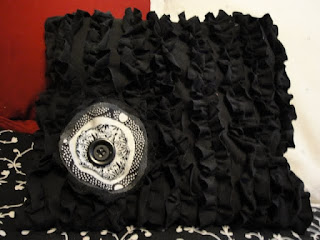
Our bed was looking a little sad with only one cute pillow- so I decided to make another one! I did get the idea from another blog- but I don't remember who to give credit to for the idea of doing the ruffles. Forgive me. I decided to post some pictures of the start to finish just in case you want to make your own someday!
1. Start with an old jersey t-shirt (preferably XL) I got mine from the DI for 1.00
2. Cut 2 14 x14 squares, or however big you want your pillow. Make sure to measure before you cut so that you will have enough fabric on the shirt left for the strips.
3. Then cut about 10 20" strips that are 1.5 inches wide.
 4. Put your machine on it's biggest stitch and stitch right down the middle of the strip. make sure you DON'T back stitch and that you have thread hanging over the ends so you can pull it easier.
5. Pin the all the strips to one end of one square. (for my next pillow I'll do them closer together)
6. Pull from the bottom tread, or the bobbin thread - this was easy to keep track of because of the way the fabric curled- as you can see in the above picture.
7. After you've ruffled the fabric pin it in a straight line to the square in several places.

8. After you've scrunched all the strips and pined them, sew right down the middle of the strip where the original thread is.
9. Now that all the ruffles are sewn on, pin the back of the pillow to the front, making sure to pin the ruffles on the two long sides away from the edge so that you don't sew them into the edge of the pillow.
10. Turn your pillow right side out and then stuff it. I made a flower from scraps that I had from other projects, I didn't sew it on, it's just pinned, this way I can trade it out for a red flower when I get around to it.
Doesn't it look cute?! I'm kinda proud of myself! Happy sewing to you!
1. Start with an old jersey t-shirt (preferably XL) I got mine from the DI for 1.00
2. Cut 2 14 x14 squares, or however big you want your pillow. Make sure to measure before you cut so that you will have enough fabric on the shirt left for the strips.
3. Then cut about 10 20" strips that are 1.5 inches wide.
 4. Put your machine on it's biggest stitch and stitch right down the middle of the strip. make sure you DON'T back stitch and that you have thread hanging over the ends so you can pull it easier.
5. Pin the all the strips to one end of one square. (for my next pillow I'll do them closer together)
6. Pull from the bottom tread, or the bobbin thread - this was easy to keep track of because of the way the fabric curled- as you can see in the above picture.
7. After you've ruffled the fabric pin it in a straight line to the square in several places.

8. After you've scrunched all the strips and pined them, sew right down the middle of the strip where the original thread is.

9. Now that all the ruffles are sewn on, pin the back of the pillow to the front, making sure to pin the ruffles on the two long sides away from the edge so that you don't sew them into the edge of the pillow.

10. Turn your pillow right side out and then stuff it. I made a flower from scraps that I had from other projects, I didn't sew it on, it's just pinned, this way I can trade it out for a red flower when I get around to it.

Doesn't it look cute?! I'm kinda proud of myself! Happy sewing to you!

No comments:
Post a Comment