Our daughter and SIL just had their 1st wedding anniversary. I saw this cute card on Spitcoast Stampers and thought is was way cute. Here is my take.
Monday, April 26, 2010
A Birthday Card for Grandma!
My husbands mother just celebrated her 86th Birthday. She loves roses and saw this cute cut in HM cart. I did some CDS to make a shaped card. I would have used my Gypsy, but in the Storybook cut it had 3 holes where I didn't want them so went to CDS to use the hide contour feature. Sure wish that was on the Gypsy...
Don't we all! Anyway the job got done.
Clap Clap
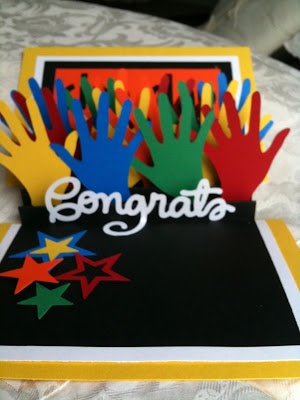
Our son-in-law just graduated from BYU this past week. I wanted to make a fun card to show him how proud we were of him.
The outside of this card is not too exciting, but just wait until you open...
Pretty fun huh? Since this is a graduation card, I showed my husband and he said, " You should have said CLAP CLAP for the CAP!" So after I took the picture I added "For the CAP". The Score-Pal came in real handy because you score a line 4 inches from the bottom and then score lines every half inch until you have 4 inches left. You fold back an forth until you have an accordian look where you can glue the hands.
A Cycling We Go!
This is a male birthday card I created for a friend. Those male cards are aways a challange, but with the cobblestone background paper by KMA, Simple Expressions and the cute black SU buttons in the wheels, it looks pretty fun! The bicycle is from the H cart and the inside is from GS.
Sunday, April 25, 2010
Fast, Easy, cheap & DARLING earring frame!
 This week has been one of the craziest weeks I've had in a long time! Graduation, anniversary, moving, leaving my job, and still I had to fit some crafting in there somehow! I currently have my earrings hanging on a ribbon across the widow in our bathroom. I thought it was cute for a while, but it just looks so unfinished and un-cute! So, I called a few girlfriends, we went and got picture frames from the thrift store and lace from the fabric store and 3.00 later this is what we came up with! They turned out quite well, if I do say so myself! I painted the wood Ivory and then I hot glued the lace on, but I've read you can staple the lace on as well. Now I have a real place to put my earrings!
Thursday, April 22, 2010
Peonies
My sister-in-law showed me how to make these when she was visiting. (Yes, there are MORE creative Highs!) With a 4 year old in the house, these were a must do to complete her hair-dos! Check them out!
First you cut out some different sized circles. Use a synthetic fabric. For best results use organza or I really like nylon lining (the stuff you would put under a satin dress or skirt.) Some synthetics just give you a burnt look and don't curl, so test out your fabric first to see if it will work. Also, your circles don't have to be perfect. I even used some ovals and uneven curvy edges.
Next you take your fabric and brush it ABOVE the flame. The heat will burn it. Don't get it too close or your fabric will catch on fire. Be careful when touching the fabric edge, it's hot!
Soon you'll have a pile of petals! Pile them together smallest to largest and sew a cross in the center to give them a pucker. I found some vintage buttons or beads for the centers. I also glued alligator clips so I can snatch them up and put them on my shirts or in my own hair!
Viola! Beautiful!
Wednesday, April 14, 2010
Card Night
Last night I got together with 4 very talented ladies for some card making fun! We each designed our own card, then brought the makings for everyone else. So we all walked away with 5 beautiful cards AND we learned a few techniques in the making! The theme for the evening was "Miscellaneous". Meaning you could make whatever type of card you'd like. Here are their creations:
April made a congrats card. I really liked her bright and cheery colors.
She knows exactly how life is. Don't we seem to accomplish MANY great things all at once? Just circle the appropriate occasion inside! And I love the tiny note box in the middle!
These buttons were my favorite. I need to do more with buttons!
Rebecca made this "get well soon" card. If I received this card, it would surely put a smile on my face.

Here's the inside of the card. The velum added the perfect touch by not taking away from the "paint" theme.
Lisa made this "thinking of you" card. We all loved how it opens in the center and I liked the fun edges on each paper.
Her whole card was warm and soft and just darling!
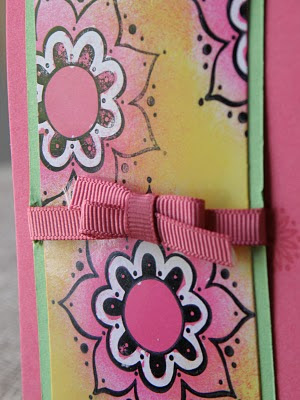
Both Lisa and Katrina's cards had some rubber stamping in them which I just love. Katrina did a "birthday" card and brought a new technique for us to learn along with her. You can check out more of her amazing paper crafting here.
I should have made Katrina stay another 30 seconds and tie my bow for me. I stink at bows on cards! Nonetheless, it gave the finishing touch and was a beautiful card to create!
Oh, I almost forgot! I did one too! ha ha! So here's my birthday card. I decided it would be good for a grandmother aged person since it talks about "age" and feels a little sophisticated. The cut was Storybook "cockatoo" for the tree with bird.
I designed the circle with the saying, but I swiped the words from a quote book.
The frame is a belt buckle from fabulous finds.
April made a congrats card. I really liked her bright and cheery colors.
She knows exactly how life is. Don't we seem to accomplish MANY great things all at once? Just circle the appropriate occasion inside! And I love the tiny note box in the middle!
These buttons were my favorite. I need to do more with buttons!
Rebecca made this "get well soon" card. If I received this card, it would surely put a smile on my face.

The paint chips were so clever!
Here's the inside of the card. The velum added the perfect touch by not taking away from the "paint" theme.
So cute!
Lisa made this "thinking of you" card. We all loved how it opens in the center and I liked the fun edges on each paper.
Her whole card was warm and soft and just darling!
Both Lisa and Katrina's cards had some rubber stamping in them which I just love. Katrina did a "birthday" card and brought a new technique for us to learn along with her. You can check out more of her amazing paper crafting here.
I should have made Katrina stay another 30 seconds and tie my bow for me. I stink at bows on cards! Nonetheless, it gave the finishing touch and was a beautiful card to create!
Oh, I almost forgot! I did one too! ha ha! So here's my birthday card. I decided it would be good for a grandmother aged person since it talks about "age" and feels a little sophisticated. The cut was Storybook "cockatoo" for the tree with bird.
I designed the circle with the saying, but I swiped the words from a quote book.
The frame is a belt buckle from fabulous finds.
Labels:
Birthday,
Cards,
Get Well Soon,
Rubber Stamping,
Thinking of You
Tuesday, April 6, 2010
Cute Ruffle Pillow

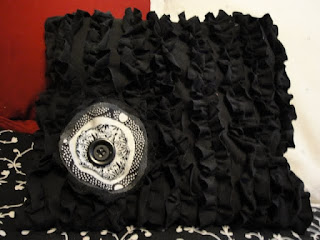
Our bed was looking a little sad with only one cute pillow- so I decided to make another one! I did get the idea from another blog- but I don't remember who to give credit to for the idea of doing the ruffles. Forgive me. I decided to post some pictures of the start to finish just in case you want to make your own someday!
1. Start with an old jersey t-shirt (preferably XL) I got mine from the DI for 1.00
2. Cut 2 14 x14 squares, or however big you want your pillow. Make sure to measure before you cut so that you will have enough fabric on the shirt left for the strips.
3. Then cut about 10 20" strips that are 1.5 inches wide.
 4. Put your machine on it's biggest stitch and stitch right down the middle of the strip. make sure you DON'T back stitch and that you have thread hanging over the ends so you can pull it easier.
5. Pin the all the strips to one end of one square. (for my next pillow I'll do them closer together)
6. Pull from the bottom tread, or the bobbin thread - this was easy to keep track of because of the way the fabric curled- as you can see in the above picture.
7. After you've ruffled the fabric pin it in a straight line to the square in several places.

8. After you've scrunched all the strips and pined them, sew right down the middle of the strip where the original thread is.
9. Now that all the ruffles are sewn on, pin the back of the pillow to the front, making sure to pin the ruffles on the two long sides away from the edge so that you don't sew them into the edge of the pillow.
10. Turn your pillow right side out and then stuff it. I made a flower from scraps that I had from other projects, I didn't sew it on, it's just pinned, this way I can trade it out for a red flower when I get around to it.
Doesn't it look cute?! I'm kinda proud of myself! Happy sewing to you!
1. Start with an old jersey t-shirt (preferably XL) I got mine from the DI for 1.00
2. Cut 2 14 x14 squares, or however big you want your pillow. Make sure to measure before you cut so that you will have enough fabric on the shirt left for the strips.
3. Then cut about 10 20" strips that are 1.5 inches wide.
 4. Put your machine on it's biggest stitch and stitch right down the middle of the strip. make sure you DON'T back stitch and that you have thread hanging over the ends so you can pull it easier.
5. Pin the all the strips to one end of one square. (for my next pillow I'll do them closer together)
6. Pull from the bottom tread, or the bobbin thread - this was easy to keep track of because of the way the fabric curled- as you can see in the above picture.
7. After you've ruffled the fabric pin it in a straight line to the square in several places.

8. After you've scrunched all the strips and pined them, sew right down the middle of the strip where the original thread is.

9. Now that all the ruffles are sewn on, pin the back of the pillow to the front, making sure to pin the ruffles on the two long sides away from the edge so that you don't sew them into the edge of the pillow.

10. Turn your pillow right side out and then stuff it. I made a flower from scraps that I had from other projects, I didn't sew it on, it's just pinned, this way I can trade it out for a red flower when I get around to it.

Doesn't it look cute?! I'm kinda proud of myself! Happy sewing to you!
Glass Etching


 This weekend my mom and I decided to try out some glass etching! we got the idea from the Create Studio Blog lucky for me my mother has every cricut cartridge you can imagine! We started out playing on one of her vases, and I'm sure there will be many more projects to come- this was so easy! and you really don't need a cricut it just makes the cutting out a lot easier if you're doing something with detail. here's a few pictures from start to finish...
 we started out with a clean glass area and a pitcher that needed some extra love...
Then we cut out the design my mom wanted on her pitcher on the cricut out of vinyl (you can use contact paper too)
 Then we put the vinyl on the vase, this picture shows that because the project was a round shape, I had to cut with an exacto knife to make sure all the areas were matching up.
 Next we used a foam brush to cover the exposed glass area with this cream (which is about 9.00 for the small jar- but guess what you can use it over and over again! and if you find a coupon for 50% off at a craft sore it's not too bad!)
 We scraped the cream off and put it back in the jar and this is what it looked like when we took our pitcher to the sink. We washed off all the excess cream and then pulled the vinyl off and look at the final project!
 We also did this with the last name "High" on one of my mom's pyrex pans and it turned out great! what a fun wedding present right?
Subscribe to:
Comments (Atom)


